
Continuous Integration! Or: Jekyll Gets Some Robot Nannies.
12 September 2017

I’ve been making a lot of Jekyll static sites lately, and the more work I do, the more it looks like I’ll be making many more. Why? Because they’re quickly proving to be sustainable, extendable, and super powerful. (For more on the potential of Jekyll, check out my project jekyll-wax.)
With more sites to manage and increasingly complex components to maintain, I’ve shifted my focus to automating acceptance tests with continuous integration. In context, this means that every time I make a branch commit to my Jekyll GitHub repository:
-
Gemnasium will evaluate my dependencies
-
Travis-CI will build my site from scratch on a virtual machine
-
html-proofer will crawl the site for errors
-
rspec, capybara, and poltergeist will perform functional unit tests.
In other words, my Jekyll sites are now pampered. If anything emerges as a risk to their success, my CI robot nannies will intervene and let me know how to stop it.
I’ll talk about the first 3 parts of the process in this post, and add another post for headless testing with rspec, capybara, and poltergeist, which is admittedly more difficult but completely worth it.
1. Gemnasium
What is is:
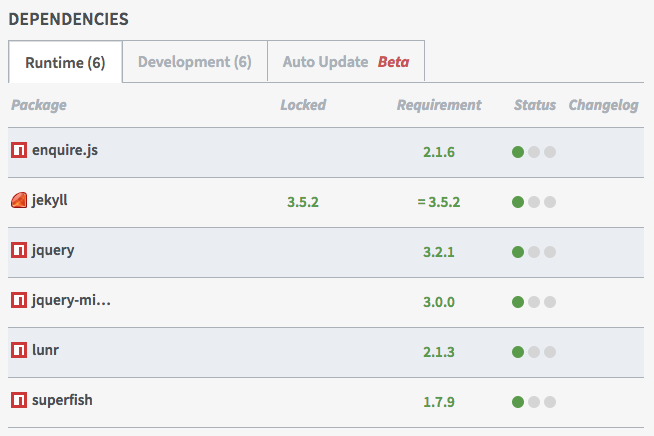
If you have valid dependency lists (in the form of a Gemfile, a package.json file, etc), Gemnasium will read them and give you a report on the status of your dependencies—altering you about which components are outdated, which require security updates, and so on.
What to do:
Get a Gemnasium account and follow the steps to activate Gemnasium on your Jekyll site repository, then configure your Gemfile and other dependency files.
Optional: If you’re like me and are extra lazy, you can set up Gemnasium webhooks to notify you via email or Slack.
What it does:
2. Travis Continuous Integration (CI)
What is is:
An automated test environment for staging code changes. It builds your application and performs tests, so you don’t have to wait to manually check your code before you commit it to your branches.
What to do:
Get a Travis account and follow the steps to activate Gemnasium on your Jekyll site repository. Then add a .travis.yml file to the root of your repository, which will tell Travis what to do. To start, it should include the following:
language: ruby
rvm:
  - 2.4 # or stable
script:
  - bundle exec jekyll build
What it does:
When you commit the .travis.yml file (either to the master branch or, preferably, to a new travis branch), it should trigger a new Travis build that will look something like this when complete.
3. html-proofer
What it is:
HTMLProofer is a set of tests to validate your HTML output. These tests check if your image references are legitimate, if they have alt tags, if your internal links are working, and so on. It’s intended to be an all-in-one checker for your output. 1
What to do:
Add the html-proofer gem to your Gemfile:
source "https://rubygems.org"
gem "jekyll", "3.5.2"

group :development, :test do
  gem "html-proofer"
end
Add the html-proofer task to your .travis.yml file:
language: ruby
rvm:
  - 2.4
script:
  - bundle exec jekyll build
  - bundle exec htmlproofer ./_site --only-4xx --check-html --allow_hash_href --assume-extension --alt-ignore '/.*/'
env:
  global:
    - NOKOGIRI_USE_SYSTEM_LIBRARIES=true # speeds up installation of html-proofer
The htmlproofer options listed above (including ---only-4xx, --check-html, allow_hash_href, and etc.) might not be necessary for you, but are a good starting place for Jekyll sites. For example, --assume-extension covers for Jekyll’s pretty permalinks (which hide their .html extensions), and --check-html will give you additional warnings for any unnecessary or unclosed html tags generated by your Liquid layouts.
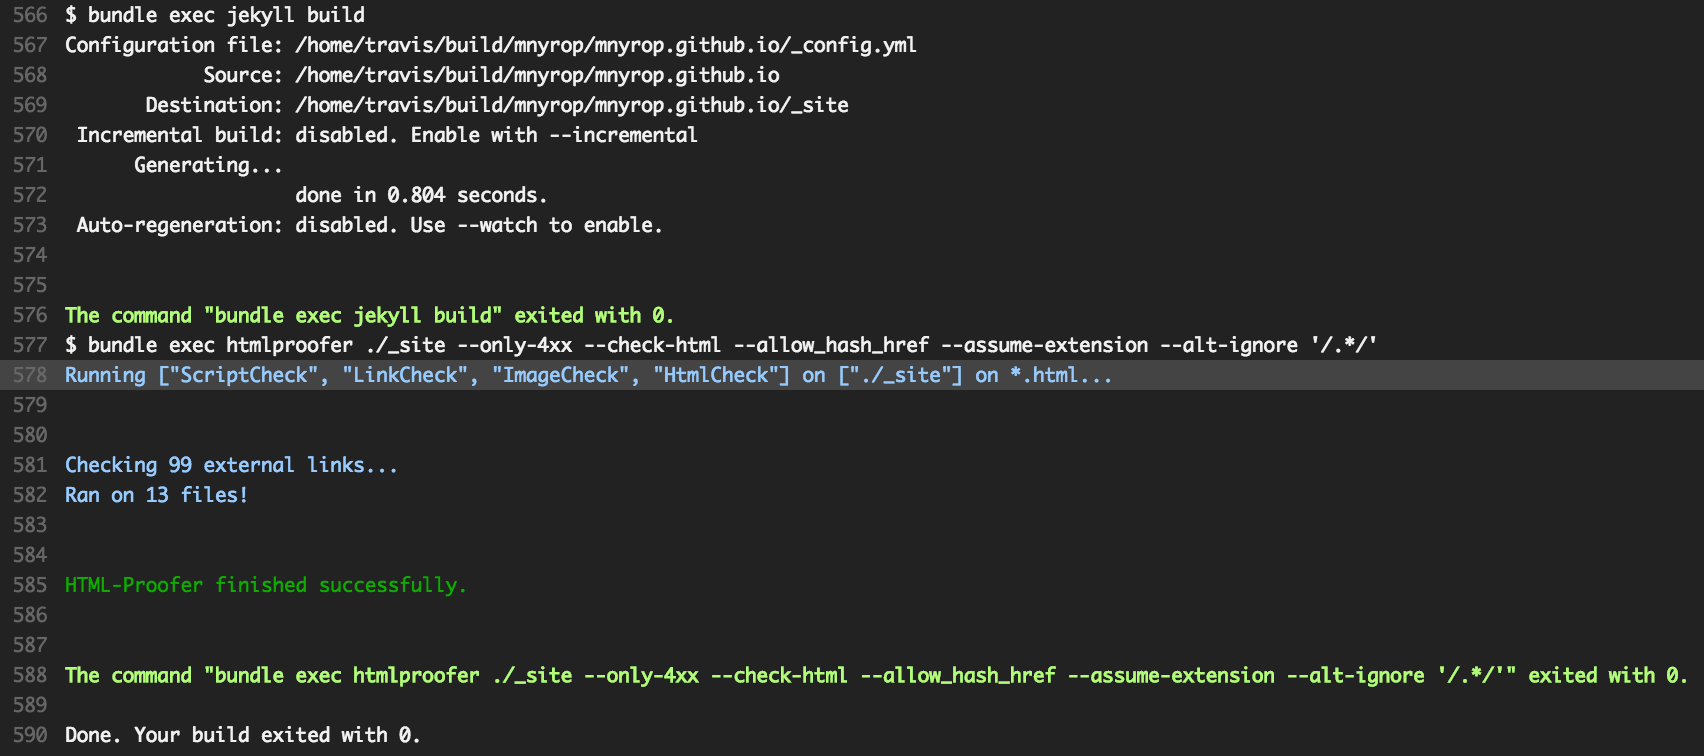
When you commit these changes (e.g. to a html-proofer branch), Travis will trigger a new build which will (once again) test the build itself, and then proceed to check for HTML errors.
You now have a very reasonably tested Jekyll site set up for continuous integration! For a more advanced topic, continue on to the next post on headless testing with rspec, capybara, and poltergeist.